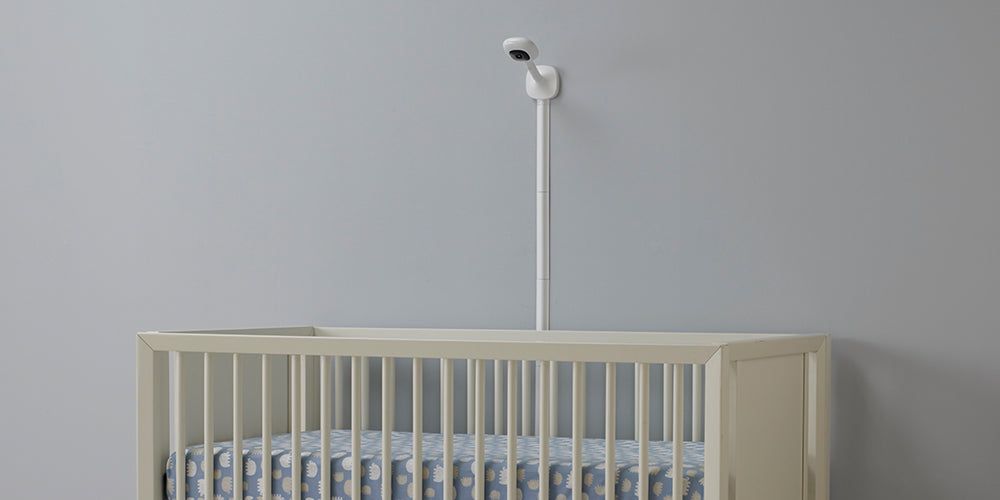
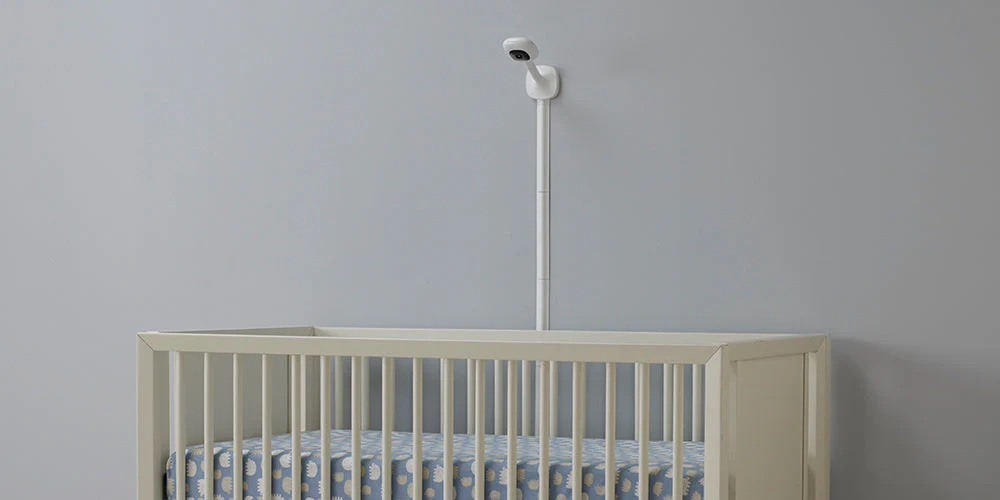
To mount a baby monitor on the wall, secure the base or bracket with screws or adhesive strips. Ensure the monitor’s position offers a clear view of the crib.
Mounting a baby monitor correctly is crucial for maintaining a safe watch over your little one. The process involves selecting a spot that provides an optimal view and minimal obstructions. Safety is paramount, so it’s important to keep cords out of reach to prevent any potential hazards.
The ideal mounting height is often around six feet off the ground, which typically aligns with your baby’s eye level when standing. By choosing the right location and securing the monitor firmly, parents can enjoy peace of mind while their baby rests. Always consult the manufacturer’s instructions for specific mounting guidelines to ensure stability and proper function of your baby monitor.
Introduction To Baby Monitor Installation
Mounting a baby monitor on the wall is a smart move. It gives a clear view of the crib. Parents can watch their baby without entering the room. This guide will show you safe and effective installation steps.
The Importance Of Proper Placement
Proper placement of a baby monitor is crucial. It ensures a good view and sound quality. It also prevents the need for frequent adjustments.
- High angle for a wide view
- Close enough to catch soft noises
- Away from the crib to avoid reach
Safety Considerations Before You Start
Before mounting, consider the safety of your baby. Check for potential hazards. Keep the monitor and cords out of reach.
| Checklist Item | Details |
|---|---|
| Wall Strength | Ensure the wall can hold the monitor |
| Cord Placement | Keep cords at least 3 feet away from the crib |
| Mounting Hardware | Use appropriate screws and anchors |
Follow the manufacturer’s instructions. Use the right tools. Make sure the monitor is secure on the wall.
How to Mount Baby Monitor on Wall? Quick & Safe Guide

Selecting The Right Location
Parents know that selecting the right location for a baby monitor is crucial. It ensures safety and a clear view of the little one. The position of the monitor can make all the difference. Here is how to choose the best spot on the wall.
Factors Influencing Monitor Positioning
- Room layout: Consider the size and shape of the nursery.
- Accessibility: Place the monitor within easy reach for adjustments.
- Power source: Ensure the monitor is near an outlet.
- Crib location: Keep the monitor at a safe distance from the crib.
- Lighting: Avoid direct sunlight on the monitor’s screen.
Avoiding Common Mistakes
- Too high or low: Mount at eye level for the best view.
- Loose cords: Secure cords to prevent hazards.
- Obstructions: Clear any objects that might block the view.
- Unstable mounting: Check the wall for sturdiness before mounting.
- Wrong angle: Adjust the angle for a full view of the crib.
Tools And Materials You’ll Need
Setting up a baby monitor involves specific tools and materials. This guide outlines everything you need for a secure installation. Let’s ensure you have all essentials and supplementary items for enhanced stability.
Essential Tools For The Job
Start with the basic tools. These are must-haves for mounting.
- Drill – For making holes in the wall.
- Drill bits – Choose the right size for your screws.
- Screwdriver – To tighten the screws securely.
- Level – Ensures the mount is straight.
- Stud finder – Helps locate studs in the wall for a sturdy install.
- Measuring tape – For precise placement.
- Pencil – To mark drill points.
Supplementary Materials For Enhanced Stability
Besides tools, some materials add extra stability.
- Wall anchors – For drywall without studs.
- Screws – Match with wall anchors.
- Mounting bracket – Comes with most monitors.
- Adhesive strips – For no-drill options.
Choose quality items for a safe and secure mount. Your baby’s safety comes first.
Preparing The Wall
Before mounting a baby monitor, preparing the wall is crucial. This step ensures a safe and secure installation. Let’s dive into the process.
Cleaning The Area
Start by cleaning the wall. A clean surface ensures a strong hold. Use a damp cloth to wipe away dust and dirt. Allow the wall to dry completely.
Marking Drill Points
Next, mark where you will drill. Use a pencil for easy adjustments. Follow these steps:
- Hold the mount against the wall.
- Use a level to ensure it’s straight.
- Mark the drill points with a pencil.
Double-check the alignment before drilling. This prevents mistakes.
| Step | Action |
|---|---|
| 1 | Clean the wall |
| 2 | Mark drill points |
| 3 | Check alignment |
By following these steps, the wall will be ready for mounting. A clean, well-prepared surface ensures a stable setup for your baby monitor.
Mounting The Bracket
Mounting a baby monitor on the wall starts with the bracket. Ensure you have the right tools and follow the manufacturer’s instructions. A stable bracket placement ensures the monitor stays secure and provides the best view of your little one.
Step-by-step Bracket Installation
- Locate the ideal spot on the wall for the bracket. It should offer a clear view of the crib.
- Use a stud finder to ensure the bracket is mounted to a stable surface.
- Mark the drill points with a pencil where the bracket screws will go.
- Drill pilot holes at the marked points, being careful not to go too deep.
- Align the bracket to the pilot holes and start inserting the screws.
- Tighten the screws until the bracket feels firm but avoid over-tightening.
Securing The Bracket Safely
- Double-check the tightness of all screws. They should not rotate or wiggle.
- Ensure the bracket does not obstruct the camera’s view or motion sensors.
- Test the bracket by gently pulling on it to simulate any accidental tugs.
- Regularly inspect the bracket for any signs of wear or loose screws.
Attaching The Baby Monitor
Mounting a baby monitor on a wall ensures a clear view of your little one. Proper attachment is crucial for safety and optimal performance. Follow these steps for a secure installation.
Aligning The Monitor With The Bracket
First, identify the best spot for the monitor. It should offer a full crib view. Keep it out of reach from curious toddlers. Mark the bracket location on the wall. Ensure the marks are level.
- Hold the bracket against the wall.
- Line up with the marked spots.
- Use a level tool for straight alignment.
Ensuring A Firm Attachment
A firm attachment prevents the monitor from falling. Use the right tools for a solid hold.
- Drill holes where you’ve marked.
- Insert wall plugs for added strength.
- Screw the bracket firmly into place.
Once attached, gently tug on the bracket. It should not move. If it wobbles, tighten the screws. Mount the monitor onto the bracket. Make sure it clicks into place.
Always check the manufacturer’s guidelines. Each model may need different installation steps. Following these ensures your baby’s safety and monitor longevity.
Cable Management
Good cable management is key when mounting a baby monitor. It ensures safety and keeps the nursery tidy. With the right techniques, you can hide cables effectively. This can prevent accidents and maintain the room’s aesthetic appeal.
Hiding Wires For Aesthetics And Safety
Hidden wires mean a cleaner look and a safer environment for your baby. Loose cables pose tripping hazards and can attract a child’s attention. This could lead to damaged equipment or, worse, injury. To avoid these risks, consider the following:
- Run cables along the edges of the room.
- Use adhesive hooks to guide wires along walls.
- Paintable cord covers blend with wall color.
- Baseboard channels can conceal wires neatly.
Using Cable Clips And Covers
Cable clips and covers are great tools for organizing wires. These accessories help secure cables against walls. They reduce clutter and minimize the chance of disconnection. Here’s how to use them:
| Type | Function |
|---|---|
| Cable Clips | Hold wires in place |
| Cable Covers | Protect and hide wires |
Choose self-adhesive clips for easy installation. Pick covers that match your room’s style. Remember to measure your cables before buying covers. This ensures a perfect fit.
Final Checks And Adjustments
After mounting your baby monitor, the final step is crucial. It’s time to make sure everything is set up correctly for your peace of mind. This involves testing the stability of the monitor and adjusting the viewing angle for the best view of your little one.
Testing Monitor Stability
Safety comes first when it comes to baby monitors. To test stability:
- Gently push the monitor to ensure it doesn’t move.
- Check the mount and bracket are tightly secured.
- Verify that all screws and fixtures are in place.
A stable monitor means a safe environment for your baby.
Optimizing The Viewing Angle

A perfect viewing angle is key to monitoring effectively.
- Adjust the monitor to view the crib entirely.
- Ensure no blind spots are present in the crib area.
- Test different angles to find the best view.
Optimal angles help you see every movement clearly.
Maintenance Tips
Keeping your baby monitor in top condition is vital. A well-maintained monitor ensures safety and longevity. Follow these maintenance tips to keep the monitor working properly.
Regular Inspection Routine
Regular checks prevent issues before they arise. Inspect the wall mount and monitor weekly. Look for loose screws or damage. Ensure the camera angle remains unaltered. Check cables for wear and tear.
Cleaning The Monitor And Wall Mount
Dust and dirt can affect the monitor’s performance. Clean the device gently with a dry cloth. Avoid harsh chemicals on the monitor. Wipe the wall mount with a damp cloth if necessary. Allow it to dry completely before reattaching the monitor.
Follow these simple steps to keep your baby monitor working like new. Perform these tasks regularly for the best results.
Troubleshooting Common Issues
Mounting a baby monitor on the wall can sometimes hit snags. This part of our guide focuses on fixing those common issues. We’ll make sure your baby monitor setup is smooth and trouble-free.
Dealing With Signal Interference

Signal interference can make the monitor’s video or sound choppy. Here’s how to fix it:
- Move other electronics away: Keep phones, Wi-Fi routers, and microwaves away from your baby monitor.
- Change the channel: Some monitors let you change their operating channel. This move can dodge interference.
- Check for obstructions: Walls and large furniture can block signals. Move the monitor or baby unit for a clearer path.
Addressing Mount Loosening
A loose mount can be a safety hazard. Here’s how to secure it:
- Check the wall material: Some walls need special anchors or screws. Make sure you use the right kind.
- Tighten screws: Sometimes, screws just need a good tighten. Use a screwdriver to make sure everything is snug.
- Use a wall anchor: For drywall, a wall anchor provides extra hold. It keeps the mount firm and in place.
Frequently Asked Questions
What Tools Are Needed To Mount A Baby Monitor?
Mounting a baby monitor typically requires screws, wall anchors, a screwdriver, and possibly a drill for pilot holes.
Can You Mount Any Baby Monitor On The Wall?
Not all baby monitors are designed for wall mounting. Check the product specifications or user manual to confirm compatibility.
What’s The Optimal Height For A Baby Monitor?
The optimal height for a baby monitor is usually 3-6 feet above the crib, allowing a clear view of the baby without obstructions.
How To Hide Baby Monitor Cords Safely?
To safely hide baby monitor cords, use cord covers or cord management systems that keep them out of reach and prevent tripping or strangulation hazards.
Is It Easy To Remove A Baby Monitor Mount?
Removing a baby monitor mount can be straightforward if you carefully follow the manufacturer’s instructions to minimize wall damage.
Conclusion
Mounting your baby monitor on the wall can significantly enhance your peace of mind. It provides a clear, unobstructed view of your little one, ensuring their safety and your comfort. With the right tools and a bit of patience, you can easily achieve this setup.
Remember, a well-placed monitor is key to keeping an eye on your baby’s movements and sleep, allowing you to relax a bit more. Start mounting today for a better view tomorrow.


