
If your device screen is black or the battery won’t charge, performing a simple restart is the best way to start fitbit charge 5 troubleshooting. Most issues with this tracker come from a frozen display or a poor connection between the charging pins and the back of the device. If the screen remains unresponsive after a restart, check your charging cable for physical damage or debris that might stop the flow of power.
Fixing an unresponsive Fitbit Charge 5
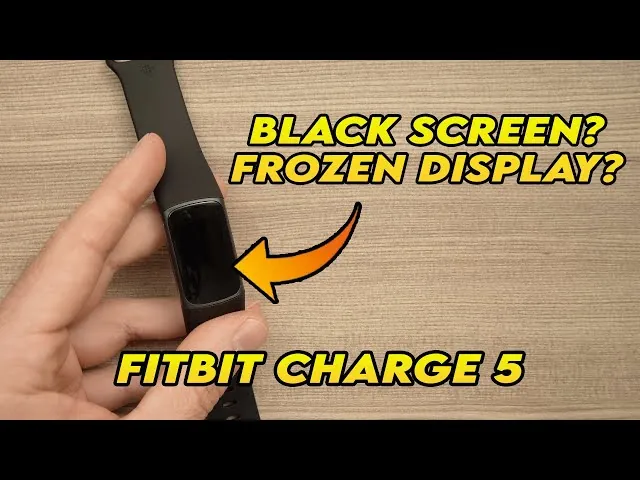
The most common reason for a device failure is a simple software hang. Like any small computer, the firmware can get stuck in a loop, making the screen appear dead even if the battery has plenty of power. You can usually fix this by forcing the hardware to reboot. If you’re wondering about the exact steps to reset your device, the official Fitbit help page provides the standard procedure for force-restarting the tracker.
Another frequent cause is dirty charging contacts. Since you wear the device on your wrist, sweat, skin oils, and dust build up on the metal pins on the back of the tracker and the charging cable. This layer of grime acts as an insulator, preventing the electricity from reaching the battery. Over time, this buildup gets thick enough that the charger simply can’t complete the circuit.
Finally, your wall adapter might be the problem. If you plug your charging cable into a high-powered wall brick meant for a laptop or a fast-charging phone, it can sometimes overwhelm the delicate power management system of the tracker. The device is designed to pull a specific amount of power; if the adapter isn’t compatible, the tracker may refuse to charge at all to protect its internal battery from overheating or damage.
Restart the device hardware
If your screen is black or the device isn’t syncing, the first step is to force a restart. This process clears the temporary memory and forces the software to reload without deleting your personal data. Locate the small button on the flat end of the charging cable that came in the box and plug your cable into a USB port.
Attach the other end of the cable to the back of the tracker. Make sure the pins align perfectly with the contact points on the device. Once connected, press the button on the charging cable three times, waiting for one second between each press. You should see the Fitbit logo appear on the screen after a few seconds. If the logo doesn’t appear, wait ten seconds and try the three-press sequence again.
If you have tried this three times and the screen is still black, the battery might be completely drained. Leave the device connected to power for at least 30 minutes before trying the button sequence again. If the tracker vibrates but the screen stays dark, the display panel itself may have failed. At this point, you should contact the manufacturer’s support team as this isn’t a user-repairable component.
Clean the charging contacts
When your device refuses to charge even when plugged in, you must clean the metal contact points. A dirty connection is the most common reason for a charging failure. Use a soft, dry toothbrush or a cotton swab dipped in a tiny amount of rubbing alcohol to gently scrub the metal pins on the back of your tracker.
Don’t use metal tools like needles or paperclips to scrape the contacts. These tools can scratch the plating off the pins, which causes permanent corrosion and makes it impossible for the device to charge in the future. After cleaning, wipe the pins with a dry, lint-free cloth to remove any residue. Ensure the pins are completely dry before you attempt to connect the charger again.
If you see a greenish or white crust on the pins, use a slightly firmer brush to break up the oxidation. If the discoloration remains after scrubbing, the metal has likely pitted, and you should stop attempting to force a charge.
Check the charging cable pins as well. If they look pushed in or stuck, they might not be making proper contact with the tracker. If you see visible bending or broken plastic on the cable port, the cable itself is broken and needs to be replaced.
If the pins on the cable don’t spring back when pressed, the internal spring mechanism has failed. If the tracker still doesn’t charge after cleaning the contacts and verifying the cable is in good condition, the issue is likely internal hardware failure.
Manage your power sources
If your device is charging very slowly or stops at a certain percentage, you may be using an incompatible power source. The tracker requires a stable, low-voltage input to charge correctly. If you’re currently using a fast-charging hub or a high-wattage laptop port, try switching to a standard USB port on a desktop computer or a verified 5-volt wall adapter.
If you use a high-powered charger, you risk damaging the battery’s capacity over time. If you use a standard USB port, it will take about two hours to reach a full charge. This is a built-in safety limit to prevent the battery from getting too hot during the charging process.
If you’re traveling and using a power bank, ensure it supports “low current mode.” Many modern power banks have an automatic shut-off feature that stops sending power if the device being charged draws too little current. If your power bank turns off after a few minutes, it isn’t compatible with the tracker. You’ll need to use a standard wall outlet or a computer port instead.
Common troubleshooting myths
Putting the tracker in the freezer won’t reset the battery. Extreme cold causes the internal lithium-ion chemistry to crystallize, which permanently reduces capacity and can crack the fragile display glass. If your battery drains rapidly, check for background sync loops instead of temperature manipulation.
Shaking or tapping the device hard doesn’t resolve software freezes. These actions often dislodge the delicate ribbon cables connecting the screen to the motherboard.
Never use a hairdryer to dry the ports after a swim. High heat melts the adhesive seals that maintain water resistance, turning a splash-proof device into a porous one. Instead, pat the device dry with a microfiber cloth and let it air-dry in a well-ventilated room for two hours.
Submerging the device in rice is ineffective. Rice can’t reach the internal components of a sealed chassis, and the fine starch dust often clogs the charging pins, leading to corrosion. If the device is wet, place it near a small desk fan to circulate air.
Avoid pressing buttons while the device is submerged. Water pressure forces liquid past the gaskets when the seal is broken by the movement of a button.
Preventing future connection issues
The best way to keep your tracker working is to maintain the connection points and follow a consistent charging routine. Keeping the back of the device clean prevents the buildup of sweat and salt that leads to charging errors.
Wipe the sensor array with a dry microfiber cloth after every workout. If you notice a faint green crust forming on the metal pins, use a cotton swab dipped in 70% isopropyl alcohol to clear the debris. Never use metal tools or abrasive pads, as these scratch the gold plating and accelerate permanent corrosion.
Aim to plug in when the indicator hits 20%. Conversely, avoid leaving the device on a charger for more than 24 hours. Constant trickle-charging generates heat that degrades the battery’s maximum capacity over time.
If your device becomes warm to the touch while charging, switch to a lower-wattage port. A standard 5V USB wall plug is safer than a high-speed laptop port or a phone fast-charger.
Related guides
Frequently asked questions
How long does it take to charge a fitbit charge 5?
A full charge takes approximately two hours using a standard USB port or 5-volt adapter. If the device is completely dead, it may take a few extra minutes for the charging icon to appear. Ensure the charging pins are aligned, as a loose connection increases charging time.
Is it safe to wear my tracker in the shower?
The device is water-resistant up to 50 meters, but you should avoid using soaps, shampoos, or body oils while wearing it. These chemicals can damage the water-resistant seals over time. Avoid submerging the device in hot water or steam, as high temperatures can break the seals.
What happens if my screen stays black after a restart?
If the screen remains black after a force restart, the display panel or battery has likely suffered a hardware failure. You can try one more restart while the device is plugged into a power source to be certain. If you still see no light, the unit isn’t user-repairable.
Why does my tracker keep losing its connection?
The most common cause for a lost connection is a dirty sensor or a loose charging cable. If the tracker isn’t sitting flat against your skin, the sensor and charging pins won’t function correctly. Keep the band snug and clean the back of the tracker with a dry cloth.
How often should I clean the charging pins?
You should clean the charging pins once a week or whenever the device doesn’t charge on the first try. Use a soft toothbrush or dry cloth to gently wipe away skin oils or sweat. Regular cleaning prevents the buildup of residue that stops the electrical current from flowing.
Conclusion
If your device is still not working after following these steps, reach out to the customer support team for your specific region. They can run a remote diagnostic on your account to see if there’s a deeper firmware error that only they can fix. If they determine the hardware is faulty, they will provide instructions on how to start a warranty claim or a replacement request.