
The most common reason for an rc transmitter and receiver not working is a simple lack of power or a failed signal bind between the two units. In most cases, you can solve this by checking the battery levels or repeating the pairing process as outlined in your manual. If the devices still don’t respond, the issue often relates to physical damage or frequency interference. You should always verify the status lights on both components before assuming a hardware failure.
Why your transmitter and receiver aren’t working
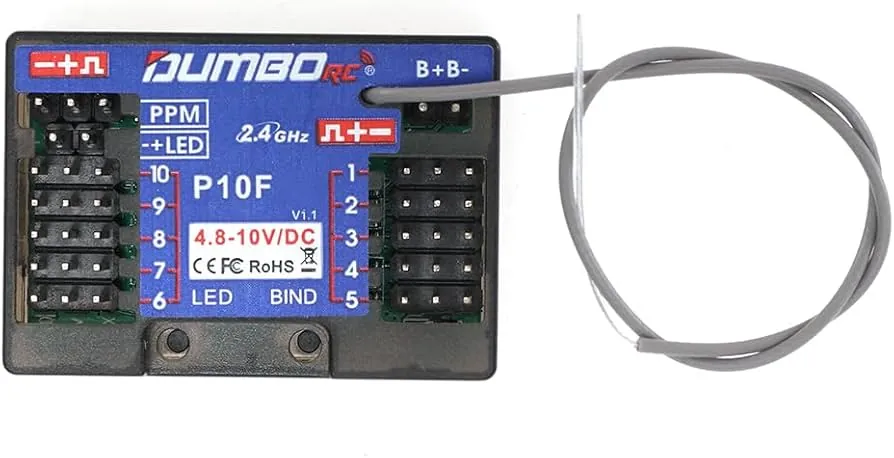
When your equipment fails to communicate, identifying the root cause quickly saves you unnecessary stress. The following table ranks the most frequent reasons for a loss of signal and how you can verify them.
| Cause | How common | How to confirm it | Fix it yourself? |
|---|---|---|---|
| Dead batteries | Very common | Check voltage levels | Yes |
| Broken bind | Common | Check status lights | Yes |
| Interference | Common | Move to open area | Yes |
| Loose antenna | Occasional | Inspect wire connection | Yes |
| Damaged circuit | Rare | Look for burnt marks | No |
| Internal fault | Rare | Test with known unit | No |
Low or depleted power supplies
Power issues are the primary culprit because they often mimic a total system failure. If your transmitter screen is dim or the receiver light is blinking red, the batteries likely lack the voltage required to maintain a stable radio link.
Always check the battery compartment for signs of corrosion or leakage, as this can prevent the flow of electricity even with fresh cells. If you’re using rechargeable packs, ensure they’re fully charged according to the manufacturer’s specific time requirements. A battery that has sat unused for months may no longer hold a charge and could require replacement. If the device still shows no life after inserting a fresh set, the internal power connector may be loose or broken.
Lost signal binding between units
A loss of binding occurs when the transmitter and receiver no longer recognize each other’s unique digital ID. This often happens after a total power loss or a sudden voltage drop during operation.
To test this, look for the status indicator light on your receiver. A solid light usually means the connection is active, while a fast blink or no light at all indicates the unit is searching for a signal. Consult your manual to find the specific “bind” button or switch sequence needed to re-establish the link. If the devices fail to pair, consult your manual for the recommended distance, which is typically within a few feet of each other.
External radio frequency interference
Radio signals require a clear path to function, and high-density environments can cause significant drops in range or total connection loss. Large metal structures, high-voltage power lines, or even other nearby RC enthusiasts using the same frequency can overwhelm your system.
If you suspect interference, take your equipment to a wide-open area away from buildings and overhead wires. You can verify if the local environment is the problem by testing the unit in a different location. The Federal Communications Commission provides guidance on how radio frequency devices operate, noting that interference is a common hurdle for unlicensed equipment. If the transmitter works perfectly in a neutral location but fails at your usual spot, the issue is external, not internal.
Safety: Inside a mains-powered machine, the parts behind the outer cover can hold a dangerous electrical charge even after it has been unplugged — that’s why they sit behind a cover. Opening the housing, or testing or replacing anything behind it, is a job for a qualified technician, never a home repair.
Rare hardware and component failures
These issues are less common but often require professional attention or replacement parts.
A frayed or snapped antenna wire prevents the signal from broadcasting properly. Inspect the wire’s path for any kinks or exposed copper strands. If the insulation is pinched, the internal shielding is compromised, and the device will likely drop signals at distances beyond ten feet.
Corroded internal contacts occur if moisture enters the casing. Look for a chalky white or green residue on the metal contact points. If you see this, use a cotton swab dipped in 99% isopropyl alcohol to gently scrub the area. If the metal has pitted or turned black, the conductive surface is gone, and the component must be replaced.
Component burnout happens when a short circuit disables the receiver board. You can often identify this by a faint, acrid smell or localized heat on the outer shell. If the device feels hot to the touch while powered off, disconnect the battery immediately. A shorted capacitor can draw enough current to melt plastic housings or damage connected peripherals.
Firmware corruption follows sudden power spikes or interrupted updates. The device may cycle through power lights without establishing a connection. If the status LED blinks in a rapid, non-standard pattern, the bootloader is likely hung. You’ll need a specialized USB-to-TTL interface cable and manufacturer-specific software to re-flash the chip.
If you suspect these problems, stop using the device immediately to prevent further damage. Attempting to repair internal circuitry without specialized training usually voids your warranty and can be dangerous.
Distinguish between a hardware failure and a simple connection error by swapping the power supply first. If the device behaves identically with a known-good power source, the issue is confirmed to be internal. If the behavior changes, the problem lies with your external cabling rather than the board.
Never attempt to solder surface-mount components unless you possess a digital microscope and a temperature-controlled rework station. Improper heat application will lift the copper traces from the board, turning a repairable fault into total scrap.
What a repair typically involves
Fixing a connection issue usually demands time, basic tools, and sometimes a replacement part. If the problem is dead batteries, the cost is minimal and equivalent to the price of a standard household pack. If you need a new receiver or antenna, the cost depends on your specific model and the availability of parts from the original manufacturer.
Most repairs involve simple steps like replacing a cable or re-pairing the software. If you need to replace an internal component, the cost is usually a fraction of buying a brand-new system. You can get a real quote by visiting the manufacturer’s official support page and entering your model number.
Avoid generic parts, as they rarely match the exact frequency requirements of your specific transmitter. If a professional repair is needed, expect to pay for both the labor and the shipping, which can sometimes exceed the value of an older, budget-friendly unit.
Frequently Asked Questions
How do I know if my transmitter is broken?
Your transmitter is likely broken if it shows no signs of life after installing fresh, tested batteries. Check the LED indicators or the LCD screen for any activity; if the screen remains blank despite a known good power source, the internal power board has likely failed.
How long does a bind usually take?
A standard binding process takes between 30 and 60 seconds once you follow the correct sequence. If the process lasts longer than one minute without a status change, the devices aren’t communicating, and you should restart the procedure from the beginning.
Is it safe to open the receiver case?
It isn’t safe to open the receiver case if you aren’t a trained technician. You risk damaging delicate internal components, voiding your warranty, and potentially causing a short circuit.
What happens if I use the wrong frequency?
If you use the wrong frequency, the transmitter won’t be able to pair with the receiver at all. Most modern 2.4GHz systems use automatic frequency hopping to avoid this, but older crystal-based systems require you to match the channel numbers exactly on both devices.
Does the distance matter during binding?
Distance matters significantly, as keeping the devices too close during binding can cause signal saturation. Keep the transmitter and receiver within the distance specified by your manufacturer’s manual, typically a few feet, to ensure the digital handshake completes successfully.
Why does the receiver light blink slowly?
A slow blinking light on a receiver often indicates that it has power but isn’t currently receiving a valid signal from the transmitter. Check that your transmitter is turned on and that the two devices are properly bound to one another.
Conclusion
If these basic checks don’t bring your model back to life, it’s time to inspect the internal wiring for any loose connections or frayed cables. Don’t worry if you can’t spot the problem yourself; reaching out to a local hobby shop expert is a great way to get back to flying.